How Can We Help?
SplashMaker+ : Smart CTAs
Availability: Premium Packages Only
This component automatically generates critical CTA URLs for you based on the various integrations you have in your chosen package. For example, let’s look at the HubSpot SmartLink…
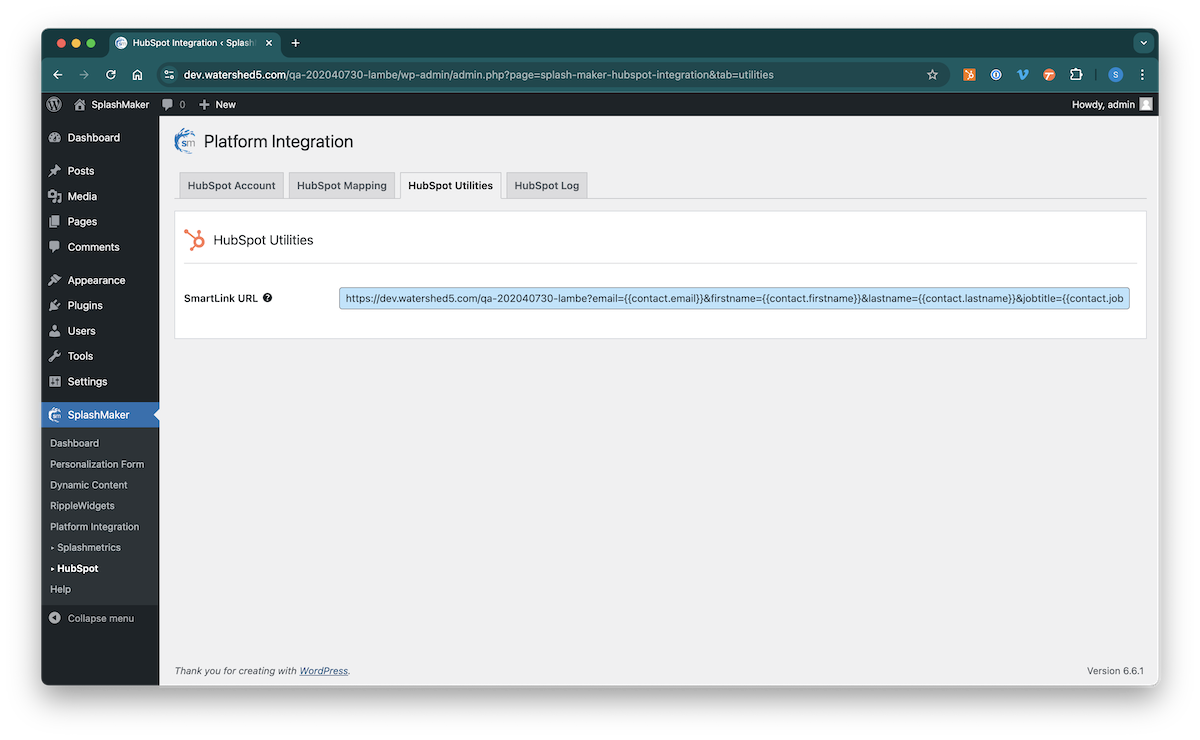
HubSpot SmartLink Generator
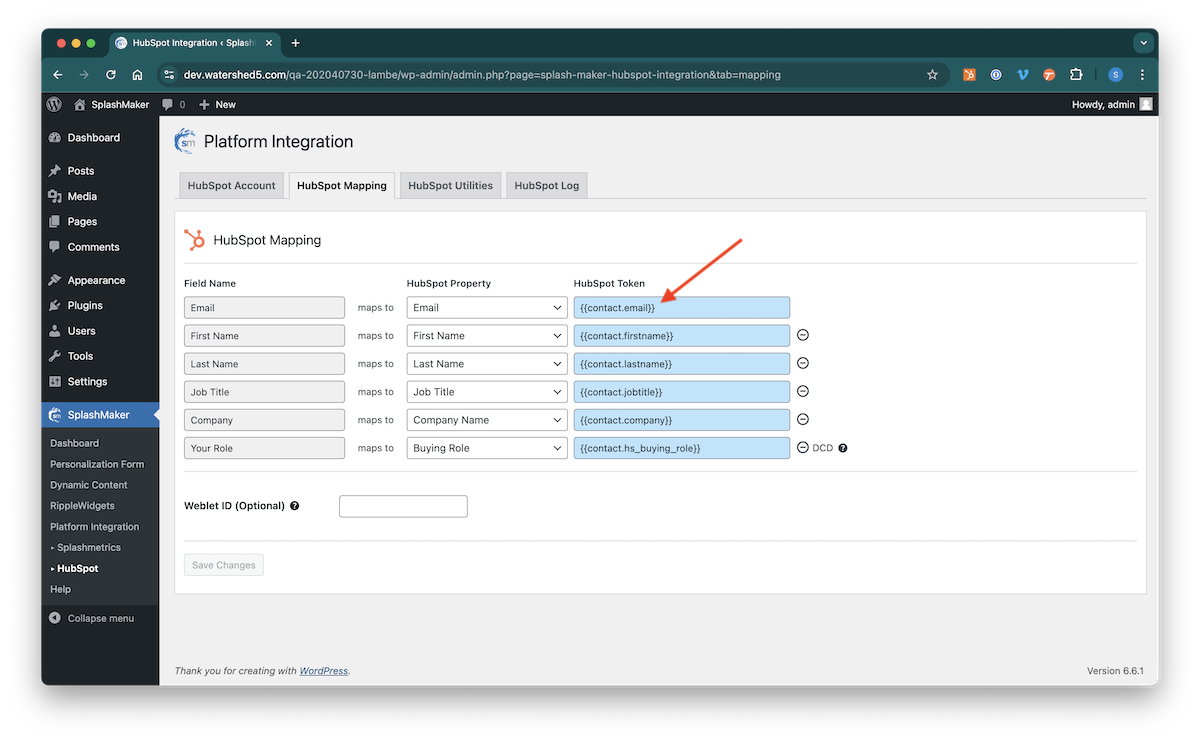
This link is automatically generated from the HubSpot Mapping component. So having that mapping right is critical for this SmartLink to function correctly. If you’ve saved the mapping page, it should look like this. Note the HubSpot Tokens in the blue fields…
The HubSpot SmartLink Generator takes these HubSpot Tokens and automatically generates a SmartLink URL to this SplashMaker content experience asset.
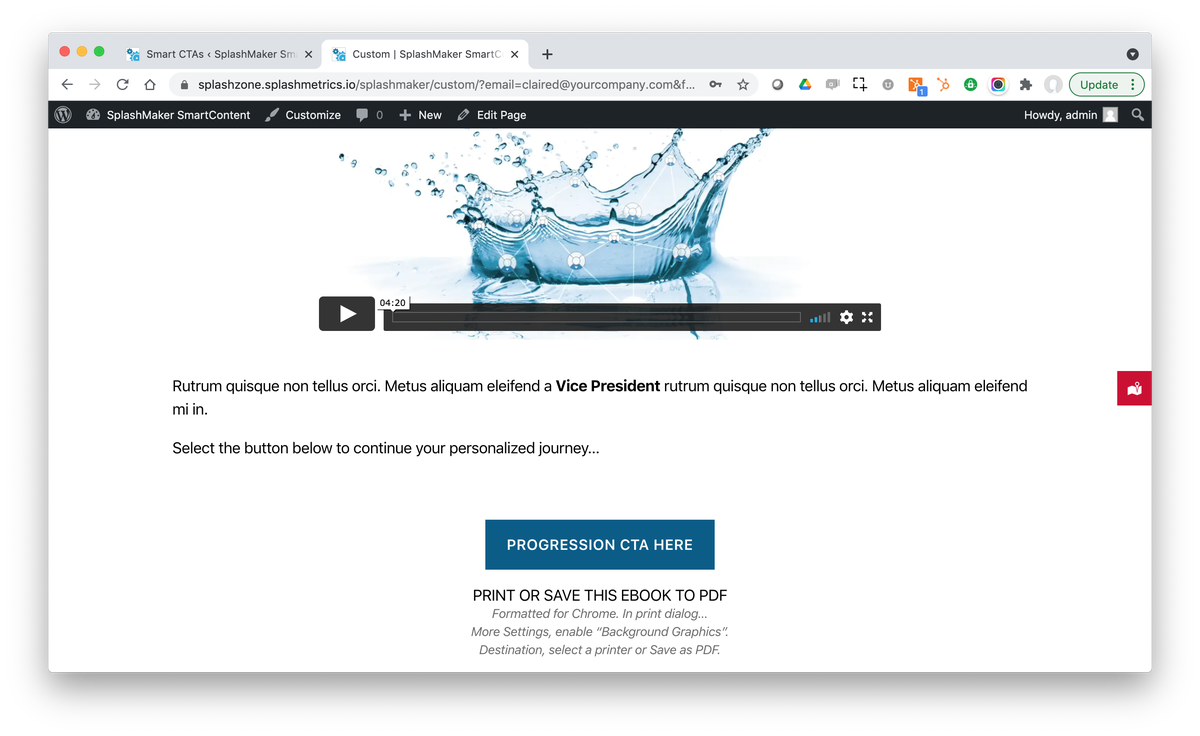
This URL can then be used in Hubspot on a text link or a button in an email, landing page, etc. – and will auto-personalize that CTA for every known Buyer for whom you already have the form information. This allows known Buyers to come directly into this SplashMaker content experience with no form or cookies whatsoever. It’s perfect for ABM!
Let’s take a quick look at the SmartLink code…
https://asset.xyz.com/custom/?email={{contact.email}}&your_role={{contact.your_role}}&firstname={{contact.firstname}}&lastname={{contact.lastname}}&jobtitle={{contact.jobtitle}}&company={{contact.company}}&assetid=XYZ-S2The items on the left side of the “=” sign are from the Personalization Form. (except for the AssetID which is from the HubSpot settings page). And the items on the right side of the “=” sign are the HubSpot personalization tokens.
NOTE: If you have added hidden fields into your Personalization Form, these will NOT automatically show up in this link. You must manually add those items to this link for it to work correctly. For example, if you have a hidden field called “Attribution” to track these assets, and the field value is set to “xyz” – you would need to add “&attribution=xyz” after the AssetID item for this to work.
If you don’t do this, the asset will auto-default back to the form page when you link to it from HubSpot.
The point is, you can always tweak these SmartCTAs as needed to ensure things work exactly the way you want them to for each and every Buyer.
Splashmetrics CTAs and CSS
If you are a content creator working from a SplashLogic specification (i.e. – your Client is using Splashmetrics), when you sync with that specification in the Platform Integration section, these Progressive and Nurture CTAs will automatically populated with URLs for where to send the Buyer next from this particular SplashMaker asset.
The “Progression CTA URL” is typically the next SplashMaker asset in the Buyer Journey. You would, for example, use it on the primary CTA – or Floating Journey Menu – on your content page…
For this link, you’ll also see the “CTA SmartLink CSS” item. This should be applied to the button or link you use for this Progression link. It automatically generates all the personalization tokens for you, atop the progression URL. As mentioned above, this is how your Buyers can move through an entire multi-stage, multi-asset Buyer journey with no forms or cookies.
Then you also see the “Analytics Data CSS” items. You can apply these classes to the same buttons to push the appropriate datapoints into Splashmetrics for full attribution.
Last is the “Nurture CTA URL”. This are used when you might want to send the Buyer to other secondary assets before moving them to the next Journey stage and asset.
NOTE: The Version01 and Version02 Dynamic Content pages that ship with our SplashMaker+ premium packages and our SmartDoc Themes already have this CSS work done for you.
All blue fields in the SplashMaker UI are auto-generated, auto-copy items. Just click in the field to copy its contents to your clipboard for use in other areas of your Smart Content, etc.