How Can We Help?
SmartStack Hosting: Overview

SmartStack Hosting Packages
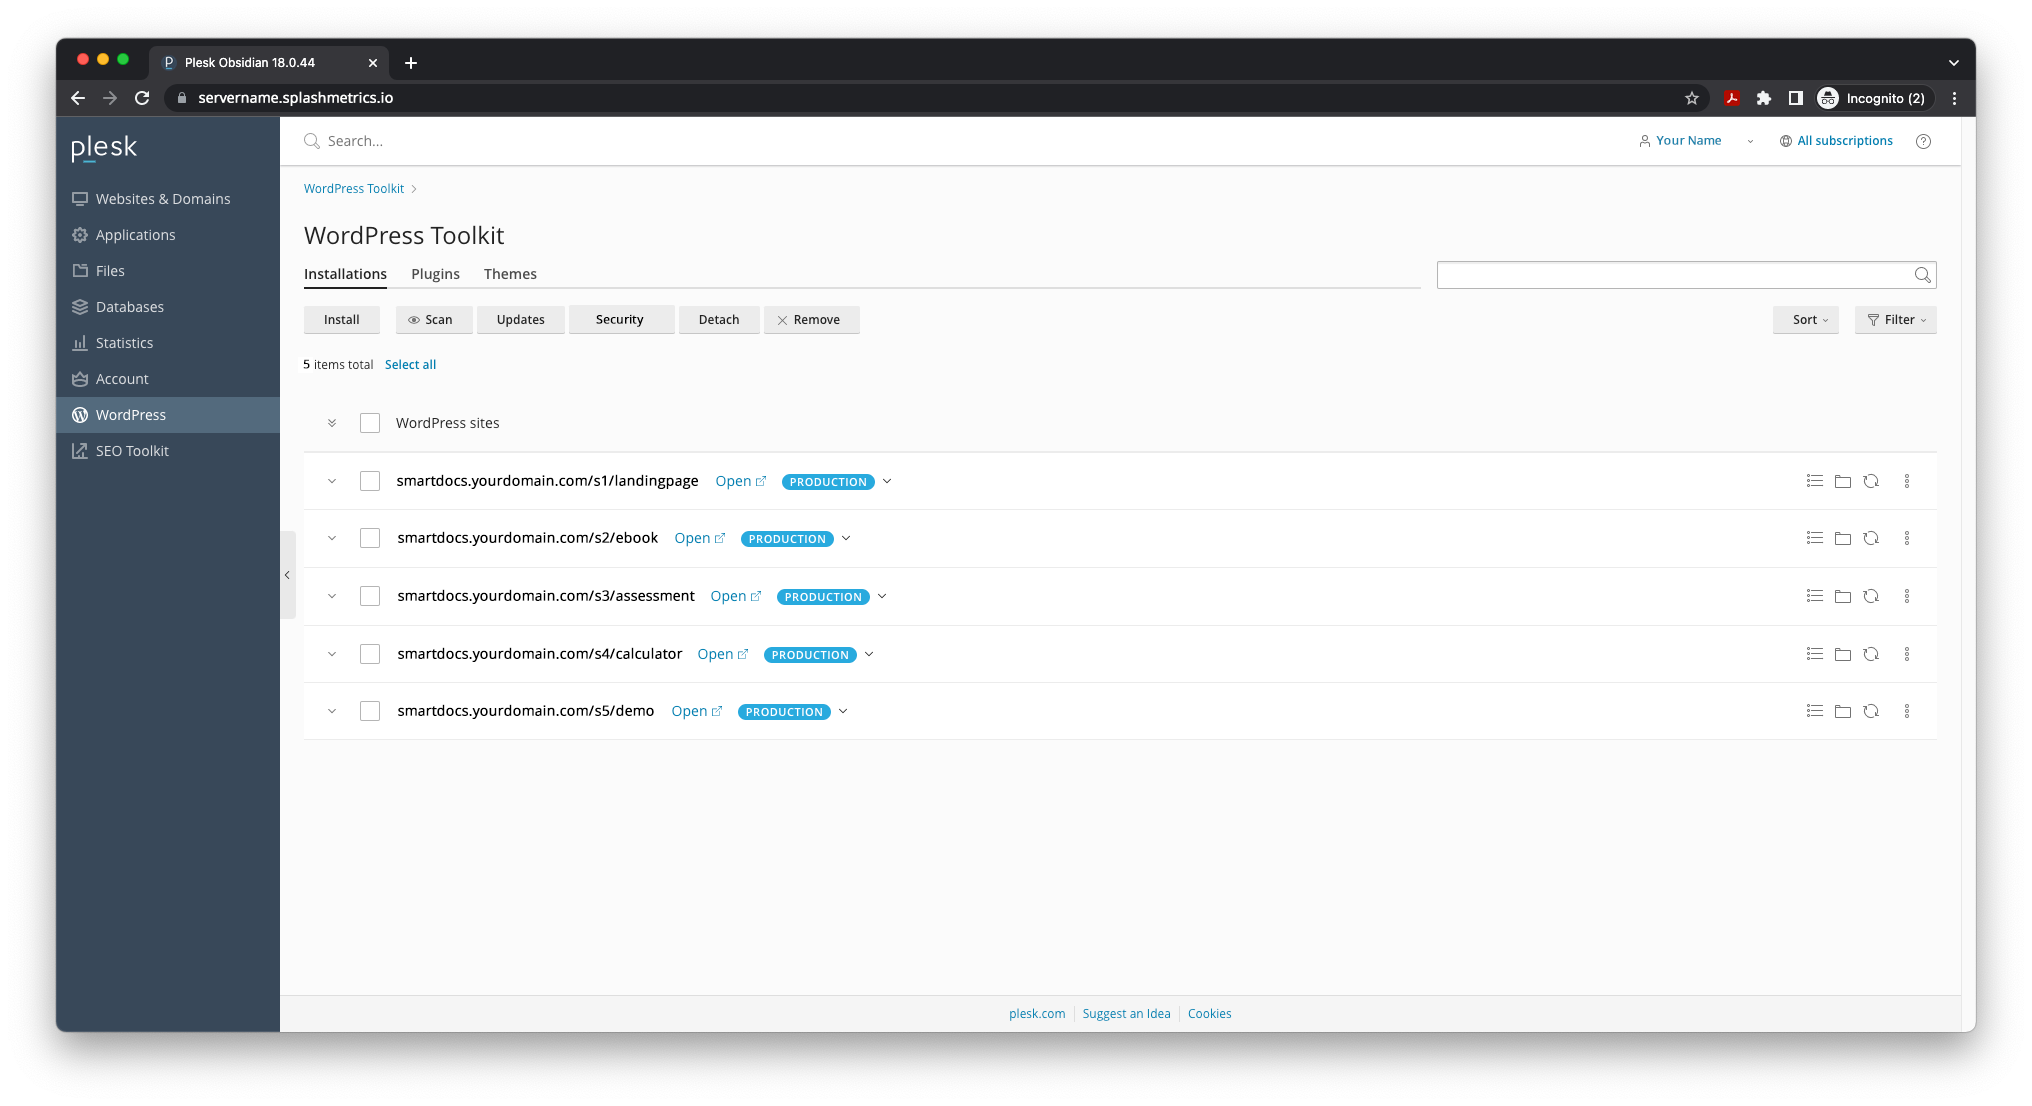
All our hosting packages are built on dedicated, secure, and scalable AWS server instances. We fully manage the server for you – keeping everything up-to-date and secure*. And as you can see above, you can conveniently manage all your Weblets from a single dashboard.
We have four levels of hosting for our customers that match the packages we sell:
- Basic
- SplashMaker Weblets reside on the managed splashmetrics.io domain where server-level security and maintenance is provided.
- Specs
- 1 GB of Disk Space
- 1 GB of Traffic/Mo.
- Ongoing server-level security and maintenance
- You are responsible for the monitoring, updating, and backing-up of your Weblets
- Plus
- Everything in Basic, plus we monitor, update, and back up your Weblets for you.
- Specs
- 2 GB of Disk Space
- 5 GB of Traffic/Mo.
- Ongoing server-level security and maintenance
- Your Weblet(s) are monitored, updated, and backed-up
- Pro
- Everything in Plus, plus your own dedicated company domain (e.g smartcontent.yourdomain.com).
- Specs
- 3 GB of Disk Space
- 1o GB of Traffic/Mo.
- Ongoing server-level security and maintenance
- Your Weblet(s) are monitored, updated, and backed-up
- Enterprise
- Everything in Pro, plus your own dedicated server instance.
- Specs
- 60 GB of Disk Space (customizable)
- 1 TB of Traffic (customizable)
- Ongoing server-level security and maintenance
- Your Weblet(s) are monitored, updated, and backed-up
- Your own custom domain
*Feel free to contact us for more specific information on our SmartStack server security protocols.
Weblets Setup
When you activate your Splash, we will ensure that the Weblets defined in your Splash are automatically set up for you. You don’t have to do any of that work. This includes installing and activating the weblets with your existing license key – up to the number allowed by your package.
All you will have to do when you login to your first Weblet is connect it to your CRM (and approve that connection in your CRM account). Once this connection is in place with this first Weblet, all the other Weblets will automatically connect with a single click.
Then, finally, you’ll just need to sync the Weblet with your Splash – and you’ll be ready to go.
Accessing Your Weblets
Your LifeGuard will provide login information to our content server, which will provide you your very own Weblet dashboard.
When you login to the server, you will see a page similar to this…

All the Weblets that have been defined in your Splash** will be listed on this page. As noted above, they are generated when you activate your Splash – with Weblet IDs in the URL where the above general names are (e.g. – smartdocs.yourdomain.com/v9S50cINpg1uBjXe1Kkl_aSntbk6Szfgio_UDnNb84).
**The Weblets shown here might be less than the amount indicated in your package specifics. That’s likely because these are tied to a specific Splash. You can always add more weblets with additional Splashes as needed – up to the limit for your package. If you need more weblets, please contact us for add-on options.
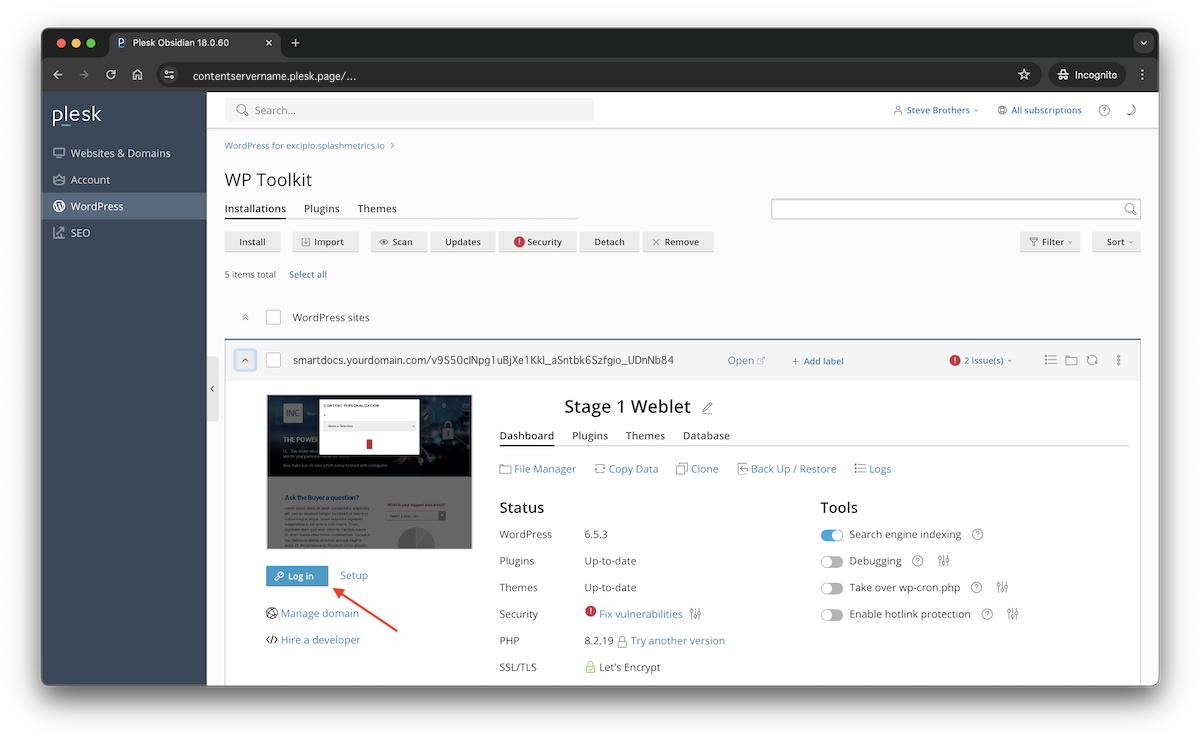
When you click on a listed Weblet, you’ll see the expanded toolset shown below. From here, you can easily login into that Weblet backend using the button indicated…

This means you can access all of your Weblets with a single login – from a single dashboard.
Finally, you’ll see lots of helpful management tools in this UI. Except with the Basic package, we provide all management, updates, and backups for all your Weblets to keep them current and secure. You just focus on building killer smart content!
